How to Make a Gallery Wall
By Jennifer Hunter | Last Updated: Jun 23 2022 | 3 min read
Have a big empty wall in a room in your home? Consider decorating with an eye-catching, add-anything gallery wall. The process is easier than you think. A great gallery wall is less expensive than a huge piece of art and lets you incorporate any style of art and objects you want to display (including things you already own!).
Don’t stop there. See how to add more color into your space.
Ready to get started? See how to make a gallery wall:
1. Find a common element
The number-one secret to making your gallery wall look cohesive, not crazy? Commonality. Even if you have an eclectic mix of things to include (and you should!), make sure that at least one element stays the same among all your items.
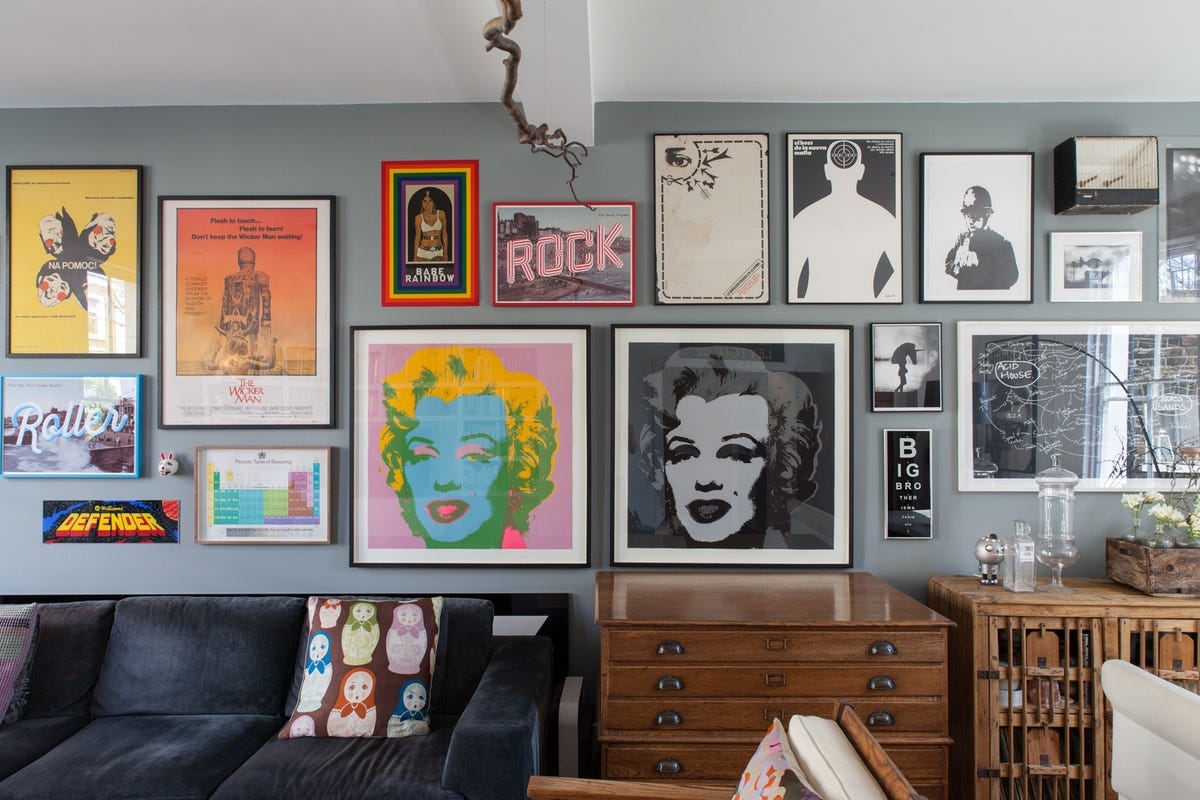
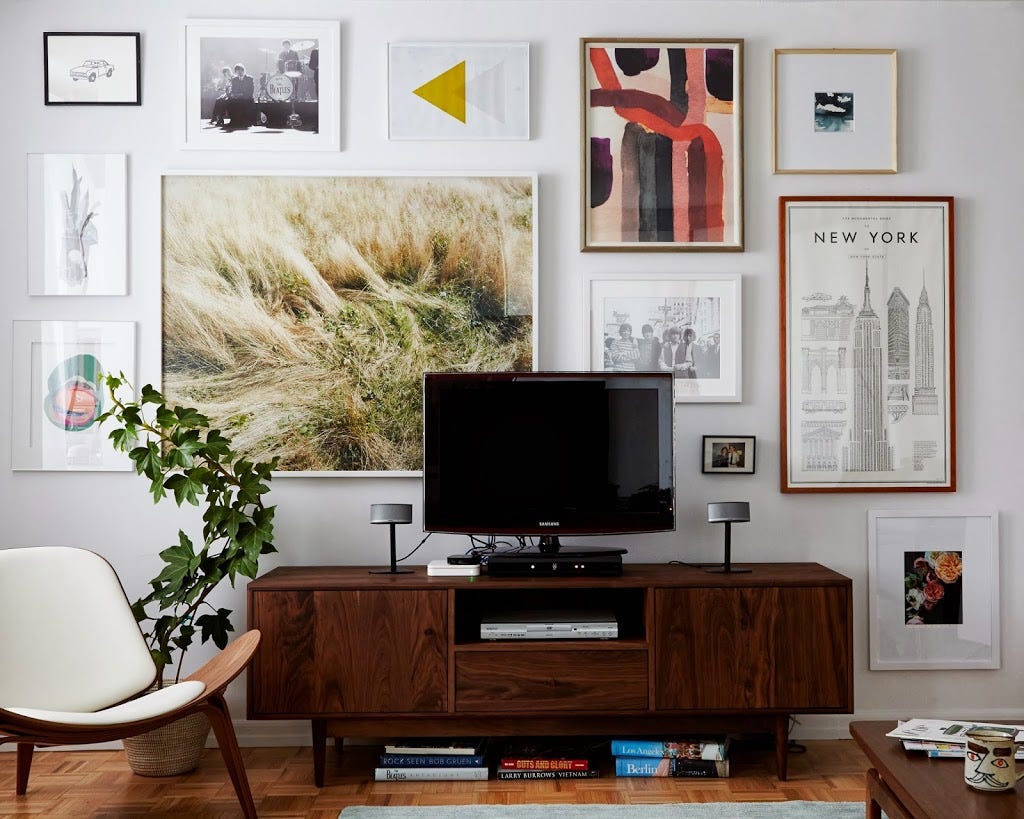
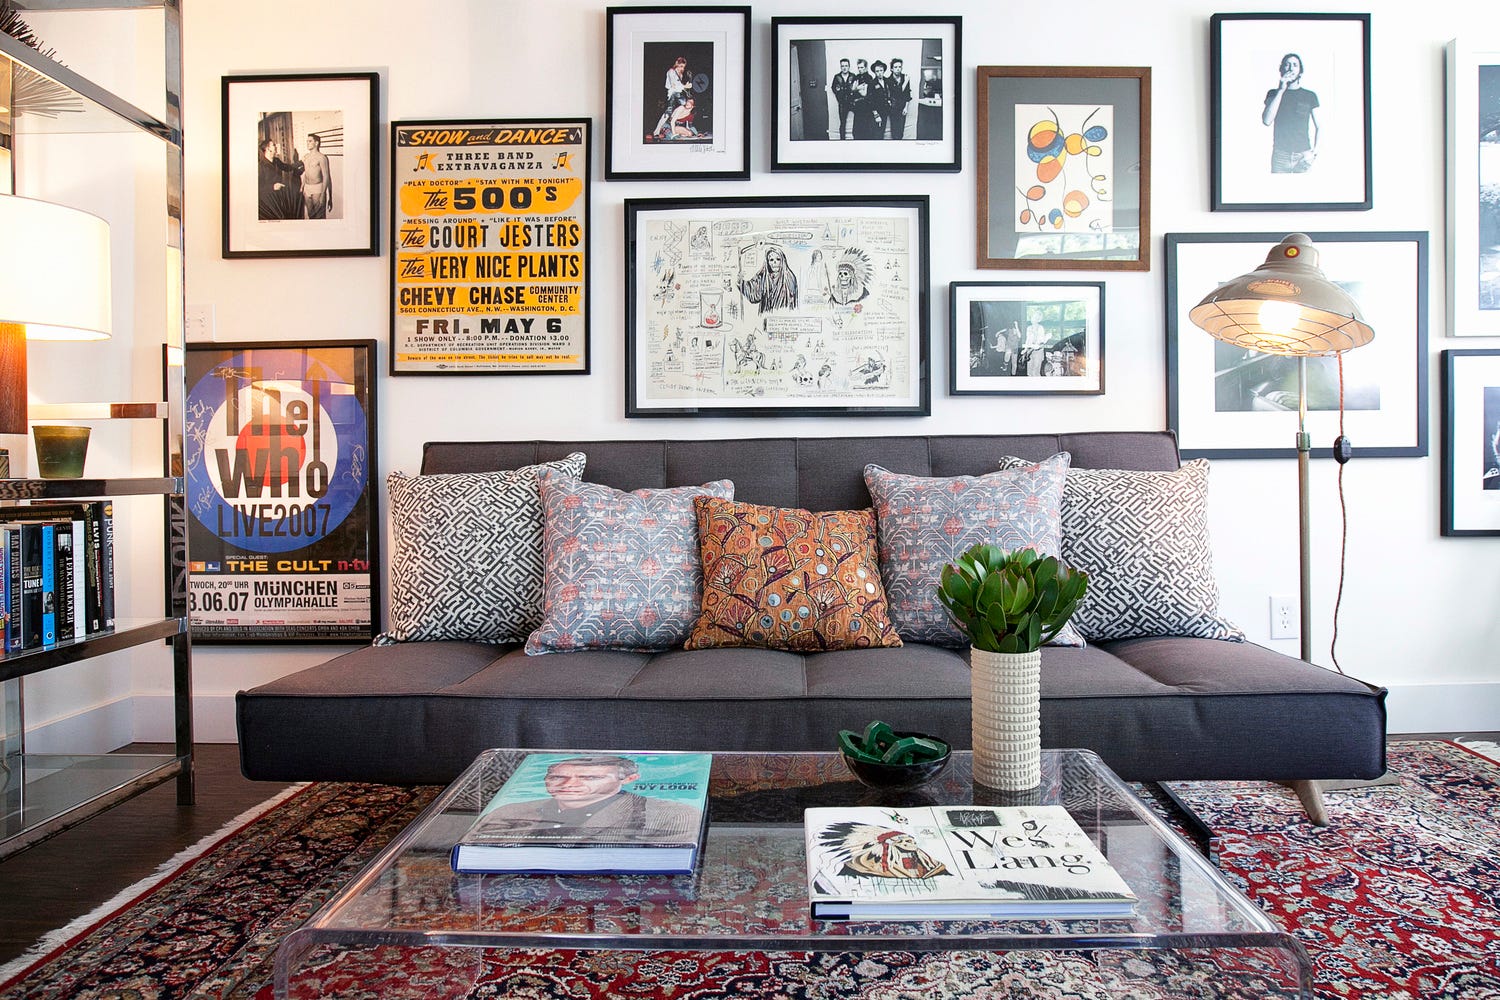
The two easiest elements to match are shape and color. Meaning, if you plan to include a mix of frames, canvases, and other types of objects, you can make it all work if they are all similarly shaped. If you use only rectangular or square frames and other pieces with 90 degree angles, for example, they’ll naturally look like they belong together and fit evenly on your wall. If most of your pieces have curves, try stocking up on oval frames in various sizes to accommodate your items.
What if your pieces all vary drastically in shape and size? No worries. Forget matching their shapes and try coordinating their colors instead. The simple way to do this is your frame choice. Frame any sized item in a classic black or modern white frame (of any shape!) and watch your wall come together like a beautiful puzzle.
2. Spacing
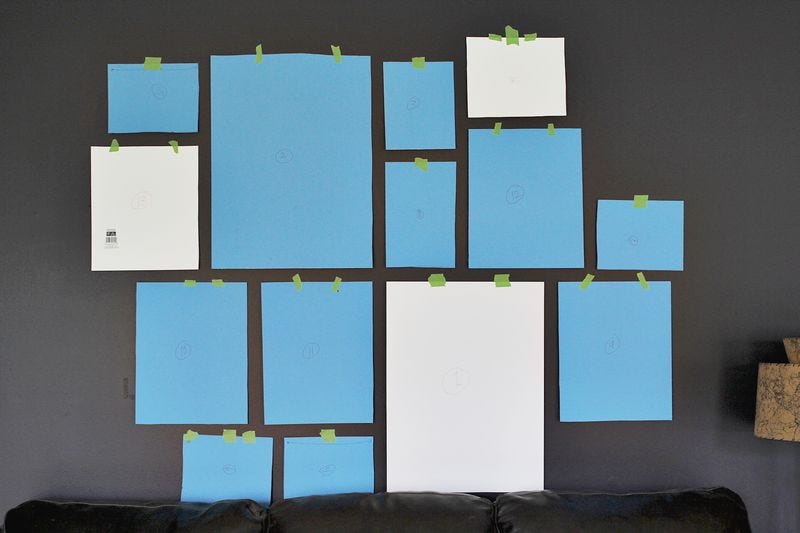
When you have all your pieces ready to roll, take some time to consider how they’ll be organized once they’re up on the wall. You may be tempted to wing it and start nailing right away, but your project will actually go faster – and look miles better – with a basic plan. Clear a space on your floor and start organizing all your gallery wall elements.
If you want your gallery wall to look a little more modern and orderly, space them out evenly. If you’ve employed the shape trick from above, try making the big outline of your entire collection roughly the same rectangle or oval shape. Think: many small square frames and objects organized within a big square. If, on the other hand, you want a more eclectic and cool look, you can make the outer border more irregular.
Fiddle with all the pieces until you have a look that you like, and remember to go with your gut about what works in your space.
3. Hang it up
Now, it’s time to get everything up off the floor and onto your wall where it belongs. You can hang each piece individually…or you can do it the easy way.
Get a large piece of paper and put it on the floor (do this step pre-layout so you can arrange your gallery on top). When you have your artwork organized just right, trace around each piece onto the paper with a pencil – you’re making yourself a template for reference. Next, tape the paper up to the wall and check that your gallery is at the right height. A good rule of thumb to follow: aim for the middle of your gallery arranged at roughly eye-level. Then simply pound your nails in where you’ll need them based on your template — right through the paper. It’s so much easier than the endless adjusting it would take to recreate your look up on the wall and you get a custom look in just an afternoon.
TELL ME:
HAVE YOU TRIED CREATING A GALLERY WALL?
Leveling-up doesn’t stop in your closet, fellas. Get the inside scoop on fitness, home, and travel.
Post image via David Telford
